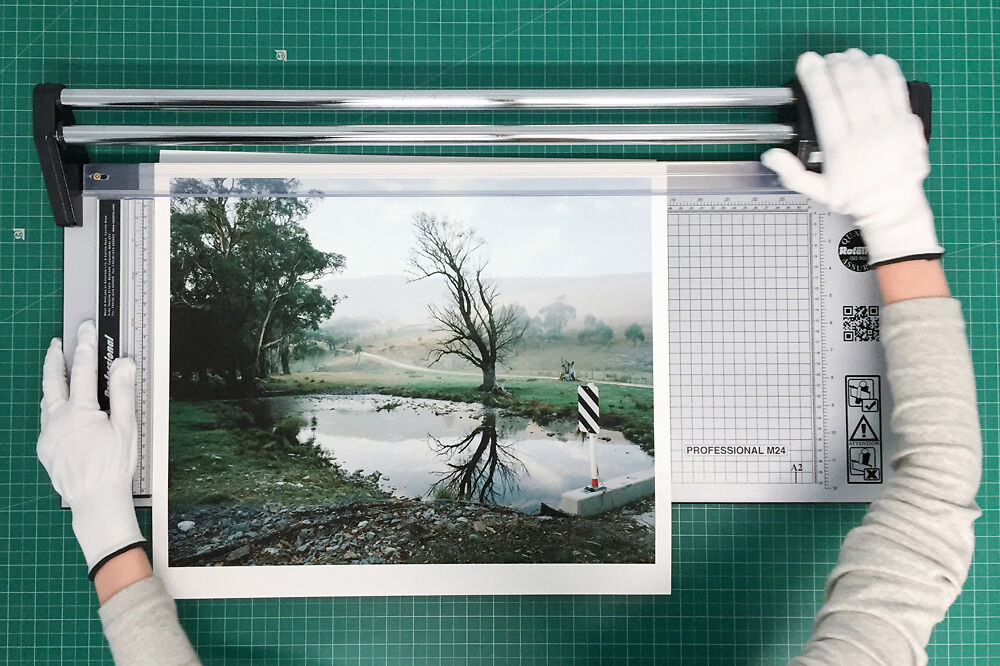
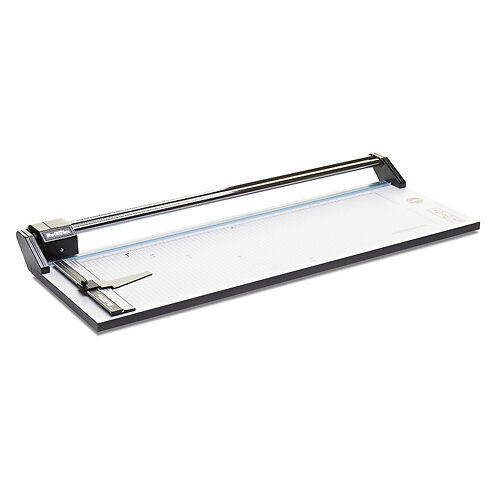
Please read our latest COVID restrictions (consultations by appointment only, & call from outside for contact-less pick-ups, please!).
Every day we print a huge variety of artworks and see all shapes and sizes. By necessity, however, fine art paper manufacturers stick to international standards, so it's not always possible to achieve perfect sizing right out of the printer.
Guillotining prints down after-the-fact is the most practical way to achieve non-standard overall paper dimensions on prints. To do this precisely and efficiently you'll need to set up your print files with just the right kind of trim marks, which this article will guide you through, but first...
At Image Science we print on the following standard sheet sizes:
And the following roll sizes:
To avoid wasting time, paper, and money we always recommend considering how your works may fit onto the above available sizes before printing (see our file setup guidelines for more info, including the printable areas on each paper size).
If print editions of your work are very important (or you’re doing large quantities) then even creating/designing the artworks to suit these aspect ratios and dimensions will have great benefits (in minimising your expenses and passing on the convenience of prints that fit affordable, ready-made frames such as ours to your customers).
Inevitably though, there are times when you’ll want a size and shape of print that is simply different than those the paper manufacturers supply. The solution here is to print your artwork on the minimum sheet or segment of roll that can accommodate your print size, and then trim it down (ideally using a sharp, clean guillotine).
Note here that if you’re having a print custom framed you needn’t do this yourself. Good framers have precise cutting equipment, so have a conversation with them before attempting any trimming – most likely they will trim your print at no extra cost to their framing service.
Standard printer’s crop marks (such as those designers may be familiar with from using Adobe InDesign) typically float in space on the corners of your print. These seem fine at first, but when trimming by hand you’ll find that once two edges are cut, there’s no way of then seeing where to line up your final cuts without taking new measurements and re-marking the sheet – a very time consuming and unnecessary process!
Another common (and unhelpful!) approach is where a ‘stroke’ has been added (from the edit menu in Photoshop). This creates a continuous line in a box shape around the artwork showing where to cut. It’s a step ahead of corner crop marks (you won’t lose your reference of where to cut in the initial slices). However, because the ‘strokes’ only form a box and don’t extend all the way to the edge of the sheet (or as near to as will print) it can be hard to line up your artwork in the guillotine precisely at the edge – often resulting in time-consuming second attempts (or worse, over-cropping by accident!).
If you’ve read the above and still plan to trim (or would like to engage our trimming service) here are our instructions:
In our example we have a photograph that we need to print at exactly 36x45cm with an even 1.5cm border on the top and sides, and a 3cm border on the bottom. This makes our overall dimensions 40.5x48cm, which is a non-standard size that we'll fit onto an A2 sheet and prepare for trimming down.
You could use our templates (found here) to do this, but for such precise setups it's usually much simpler to just set your 'image size' (found in the image menu) to your print dimensions (be sure not to resample here) and then build out extra canvas using 'canvas size' (also found in the image menu). Be sure to select 'relative' and make use of the 'anchor' feature to designate where and by how much you are extending your canvas.
Here we want to minimise the total number of cuts required when trimming, so we'll set our desired print area into one corner of the sheet. We start by locking guidelines to two adjacent edges and then going back to 'canvas size' in the image menu. There we'll first anchor the canvas in the opposite corner of where we'll cut, then extend the canvas to the full dimensions of an A2 sheet.
Once the print dimensions, trim guidelines and canvas are all set correctly, choose the pencil tool (which is a secondary option within the brush tool), set the pixel width to 1, and choose a medium to light grey.
Choosing a light grey and setting the pixel width to 1 is important so that if your cut is slightly off (i.e. if even a tiny fraction of the trim line remains on the print side of the cut) it will effectively become invisible to the human eye. This will avoid excess re-cutting (which would be necessary if you've used black).
Click on the guideline outside the canvas, then hold down the shift key and drag across the entire length of the canvas, release the mouse button and shift key on the other side of the canvas. Repeat on all other lines.
Note that the order of clicking first, then pressing and holding the shift key is important. If you do it the other way around some funky diagonal lines can run over your image between different points on your guides (and ruin your print!).
Double check your trim line has been drawn correctly by zooming in on your guidelines, you should see it very clearly up close.
You now have a perfectly prepared print with trim lines that are far better than common ‘crop marks’ or surrounding ‘strokes’ for easy, precise trimming.
- Mark G -Just a quick note to let you know that I was thoroughly impressed with the high quality of your scans and your quick turnaround time. In particular the lack of dust and scratches helped reduce my previous touch up time dramatically.
I will not hesitate to use your service again in the future.