Please note that we are open by appointment only (except for click and collect pickups once notified ready).

How To Order Prints

Our online ordering system makes ordering prints simple - once you know the steps, what you want to order, and what everything means.

So, here's our guide to the various steps for a succesful print order.

Quick Summary

It's a simple 4-step process to make your print order.

  1. Prepare files according to our file prep specs
  2. Upload files using our file uploader
  3. Submit matching print order
  4. Checkout (Shipping & Payment)

Each of these steps are separate, so we'll explain in more detail below.

The Detail

1. Prepare Files

We have three file setup options to choose from:

  1. Self Setup. You can setup your images yourself. Make sure you're across all our specifications, as we require files to be supplied already setup and laid out as per those specifications. We have downloadable templates to make this easy. This is our recommendation.


  2. Automatic Best Fit. We can setup files to 'best fit' within the safe printable area free of charge. This means we'll take your whole image and automatically size it to print as large as possible within the safe printable areas on your ordered size/s. This will not stretch/distort or clip your image in any way, and is the quickest option. However being automatic the result may not be precisely what you are expecting - particularly regarding the exact dimensions of ink on the page and the white space around your print.


  3. File Setup Service. If you have specific image size, layout or border width requirements outside of our automatic 'best fit' layout and don't want to do the setup yourself we offer a file setup service for a small fee. You can send us the largest version of the file(s) you have, and very clear instructions, and we can do the file setup for you (+$5 per file/per setup) - added using the 'Add File Setup Fee' button on the order page. One $5 setup fee is required per file/layout. If you have more complex layouts, these will come under our re-touching services as detailed here.


Please indicate in your order or file upload which option you want or are using.
 

2. Upload Files

The next step is to send us your files. Note that just sending us files does not trigger any action in regards to your order.

We offer an excellent and robust File Uploader on our website (linked below).

Whilst we do prefer you use our File Uploader, we do accept links from file sharing services like Dropbox or Google Drive - just make sure to send us a public link to your files (or even better, just put the link in the order when you make the actual matching print order).

If your files are already on Dropbox then you can save uploading time and just use our Dropbox File Request to send them straight over to us.

N.B. Important note: we do not get your contact details (or even your name) when you send files this way, so we will not be able to contact you about any issues with your files - as with all orders you must submit an online print order to actually trigger us to look at the files & process your order.

Always make sure you send your name, phone number and email along to us too!

3. Submit Matching Print Order

Printing Sample Pack
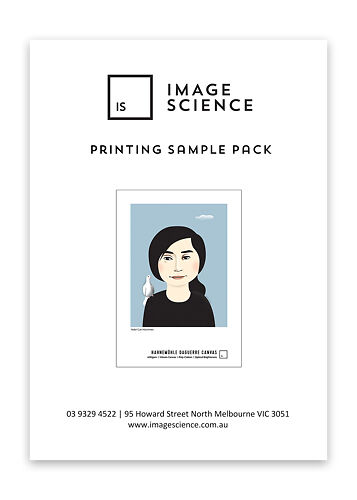
A pre-printed sample pack containing the most popular papers that we print on in our Fine Art Printing service.
Free Shipping - this product ships free!
▪ Please note: Unfortunately we can't personalise these packs with your own images. These packs are pre-printed with a broad range of images to help you select printing papers.
▪ Please note that this is shipped untracked
$15
More info

The time has come to make your actual order using our Print Order Form (linked below also).

1. Click the 'Add Prints' button to get started.

2. Choose your preferred paper type (a list of our available papers and their characteristics can be viewed here, we also sell sample packs of all our papers). In this example we'll select Photo Rag.

3. Choose from sheet or roll print (24" or 44") options depending on your print size. We print from A4 through A2 in sheets, anything larger on rolls. In this example we'll choose sheet print.

4. Choose your specific sheet size, or roll segment length (rolls prints are charged in 5" increments down the roll, starting at 10"). In this example we are going to choose A4.

5. Change the quantity if more than one of the same paper type and size is required. In this example we are going to choose 4 - to clarify, we have now added 4x A4 Photo Rag Prints.

6. Add more prints of different sizes or paper types if needed using the 'Add More Prints' button - this will add a second line. Follow the above steps to select your paper type, exact sizing and quantity. In this example we are going to add a 24x35" Roll Print on German Etching.

7. Add any notes if needed.

8. If you need assistance with setting up your files according to our File Preparation Specifications use the 'Add File Setups' button ($5/layout).

9. Finally, you must save the prints to your shopping cart, and then proceed to checkout (the next step).

4. Checkout

The final step is to proceed to your cart for checkout and to complete your details and payment.
You can go to your cart using the button in the top right corner of the website, or using the little green button that pops us during the previous step when you click the 'Save Prints To Cart' button.

Double check your print quantity, paper and size is correct, then enter a postcode for pickup or shipping options (and rates).
Continue on by clicking 'Procced to Checkout'. Here you can enter billing and shipping information and proceed to payment.

Done

That's it! You're done. The order and files will come straight through to us and we'll get on it.

If there's ever any issues with your files we will get in touch.

You will receive a text and email when your order is ready for pickup, or tracking details when it has shipped.