Printing Your Custom ICC Printer Profiling Target
Black & White Target Print - Pc - Adobe Colour Print Utility
This is a page from our Custom ICC Profile Service Instructions.
Please see the panel to the right for a guide through these instructions.
Please note this black and white profile service is only intended for recently made printers with specialist black and white printing modes using multiple black inks (like Epson's Advanced Black and White mode), or other printers producing already very neutral prints via a RIP like ImagePrint or QuadtoneRIP. It is designed to give you accurate tonal placement via accurate soft proofing, and to indicate paper tone accurately.
This process will NOT neutralise a non-neutral printing process.
We're one of only a handful of services in the world to offer custom ICC profiles specifically for black and white printing. Whether you use the Advanced Black and White mode with the Epson pigment ink printers, or something more exotic like Quadtone RIP, your black and white printing process can be profiled - and thus you can open up the world of soft-proofing your black and white prints, just like you are (hopefully) soft-proofing your colour prints already.
Having an accurate soft proof allows you to better pre-visualise your results. You can see the difference between papers without actually printing, and can place tones in your image more precisely at the points you want between d-max (your darkest possible black) and d-min (the lightest grey you can print). You can also see how the white point of a particular paper will affect your print - to decide, for example, if your image will be better printed on a warmer fine art stock, or a bright white semi-gloss stock.
Opening and Starting
When you run ACPU you will be greeted with a file explorer window asking you to 'Please select a TIFF file to print'. Locate and open the Image Science Profile Target that you previously downloaded.
You will now be greeted with the main ACPU window:
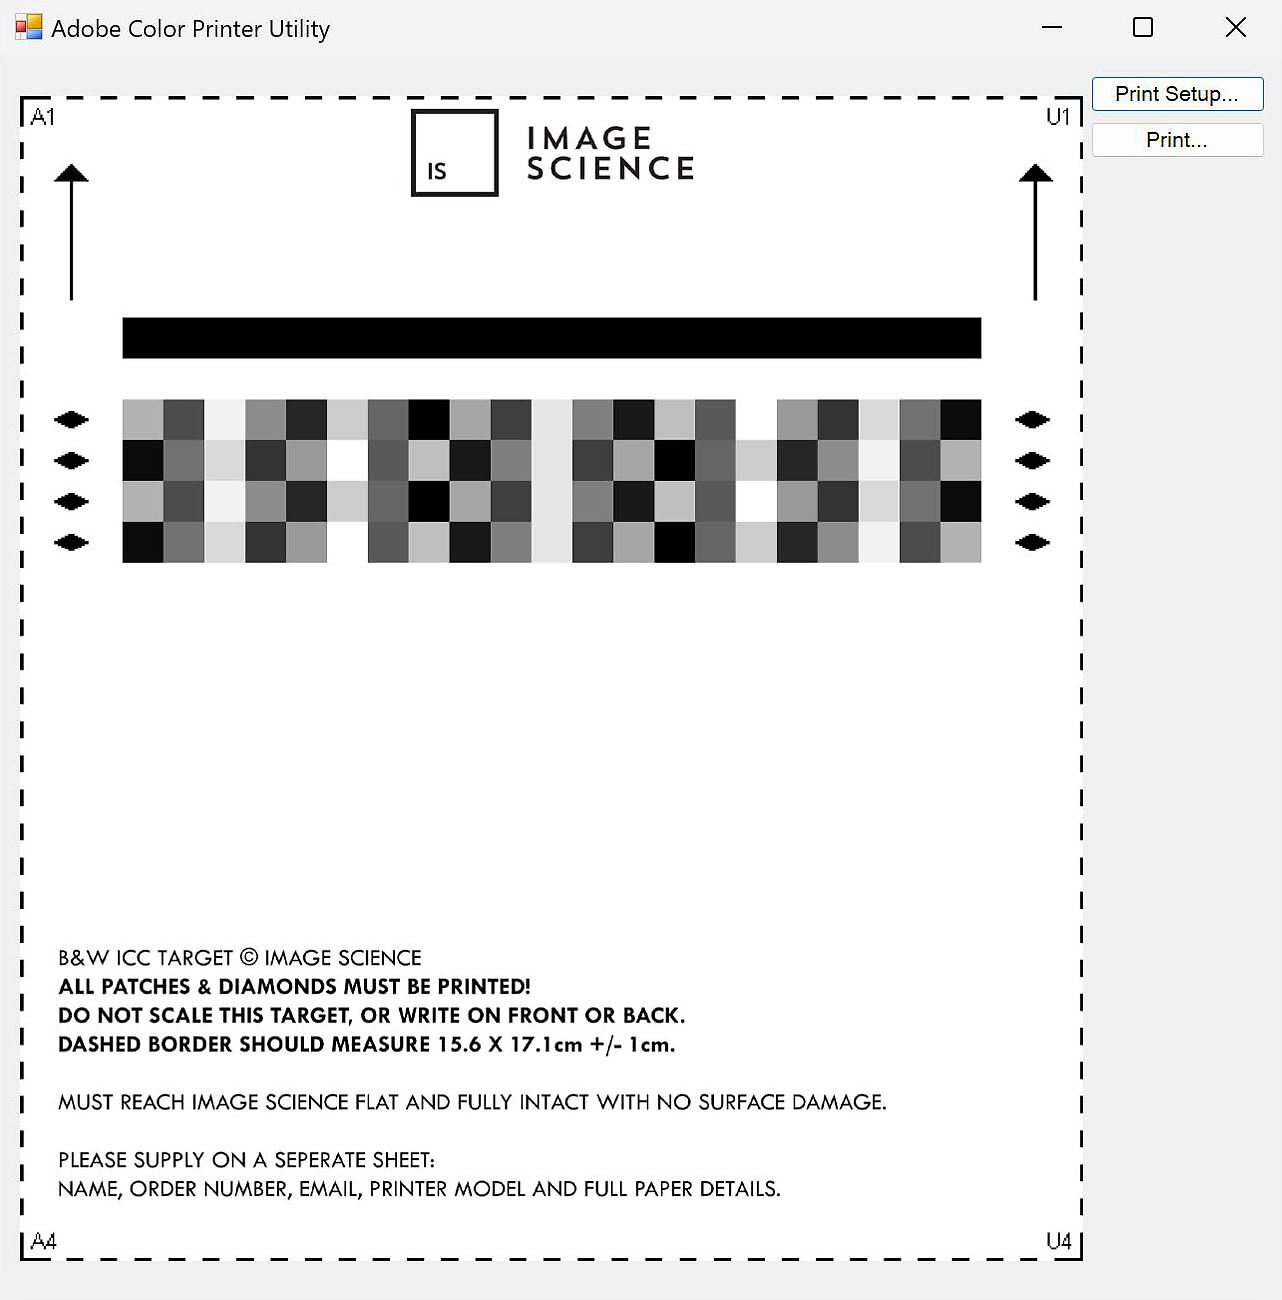
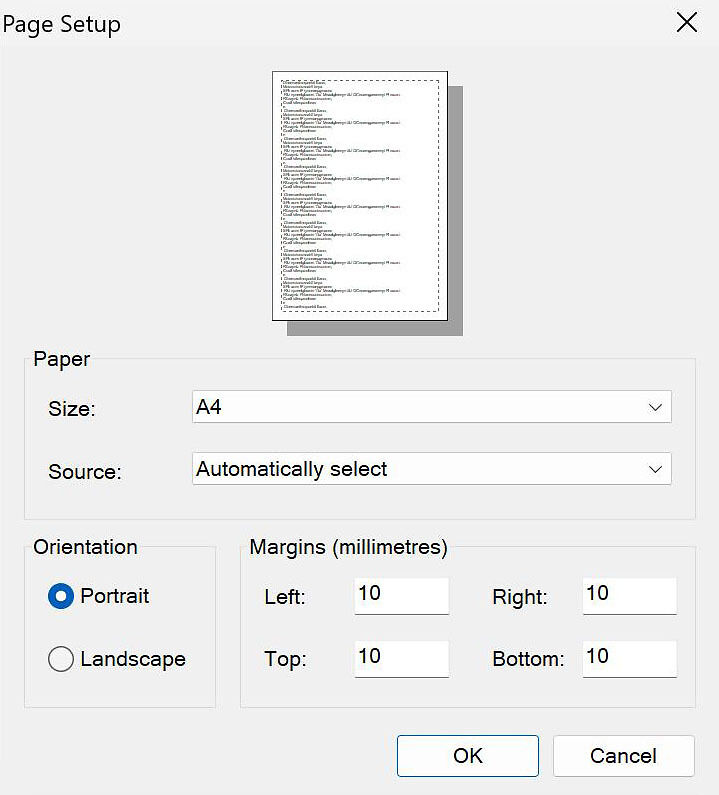
Click 'Print Setup' and choose A4 for size. Hit 'OK' to return to the main window.
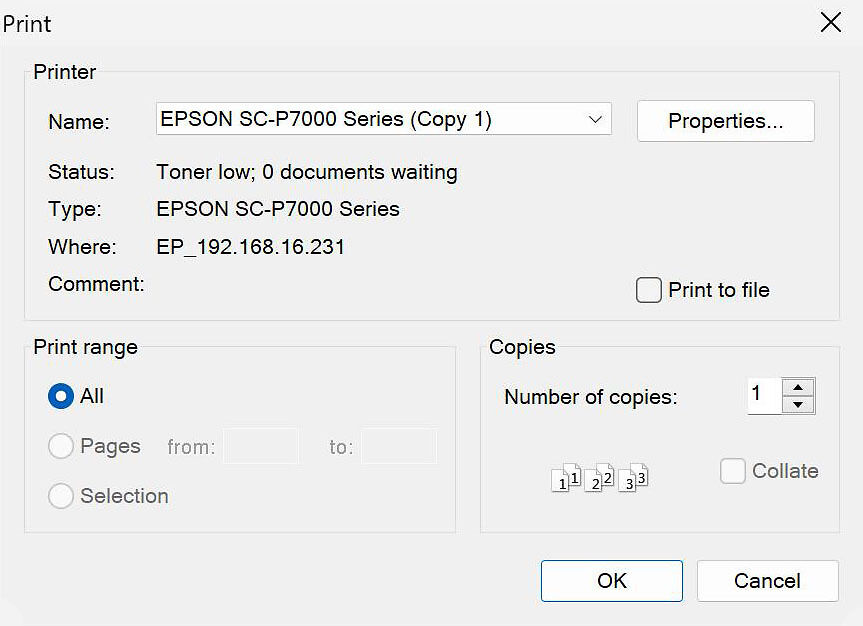
Now move through to the printer driver by hitting 'Print'.
Select your printer from the 'Name' dropdown.
The next stage depends very much on your printer driver.
Driver Settings
Click the 'Properties' button to enter your printer driver settings
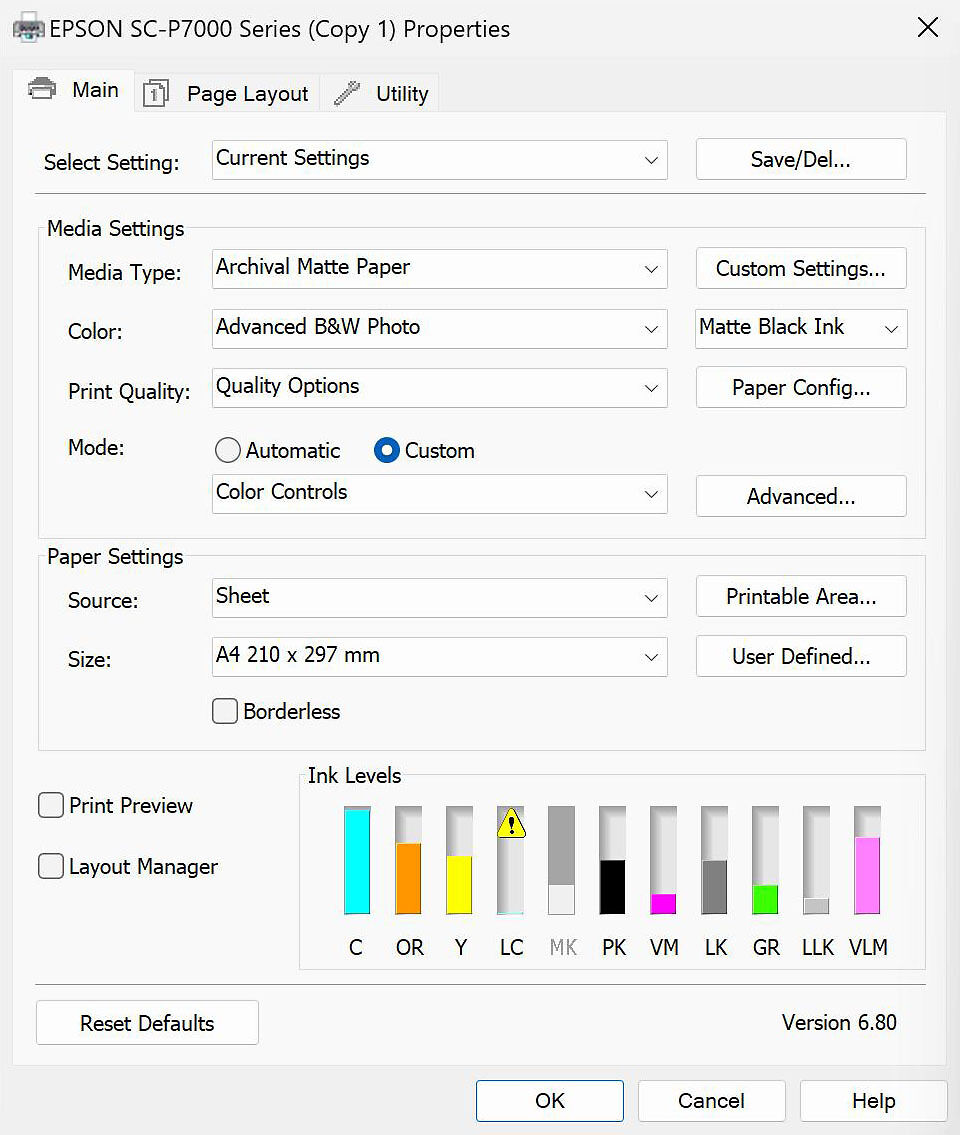
Below is a screenshot where we have chosen the correct settings:
Choose the appropriate 'Media Type' (Paper Type) as per our paper type setting guide for this - in the above example we are doing Hahnemuhle Photo Rag so 'Archival Matte' is the most appropriate option.
Set 'Color' to 'Advanced B&W Photo' because we're doing a B&W Target (this engages your printer's specialist black and white printing mode).
Quality Settings
Under 'Print Quality' choose 'Quality Options' which will bring up another window where we can choose the appropriate quality settings.
We have chosen a quality level of 'SuperFine' in this case, but you can choose whichever suits you best. Most people just choose the highest setting.
Generally the highest or one step down from the highest quality level is appropriate. Note that generally your profile will work fine across quality settings,
so if you change your mind once you’re printing with the profile, this should not cause issues.
For High Speed, in general we recommend leaving this unticked. It makes no functional difference in regard to profiling, but can affect print speed as it toggles between uni-directional and bi-directional print head movement (again choose the best compromise between speed and quality).
Edge smoothing should be unticked.
Finest detail you can choose ticked or unticked. Your printer is slower but sharper in finest detail mode. We recommend ticking it.
Click Okay to return to the driver settings window.
Colour Toning
Under 'Mode' choose 'Custom' and from the dropdown choose 'Color Controls'.
Next you want to click the 'Advanced' button next to 'Color Controls', which gave us this screen:
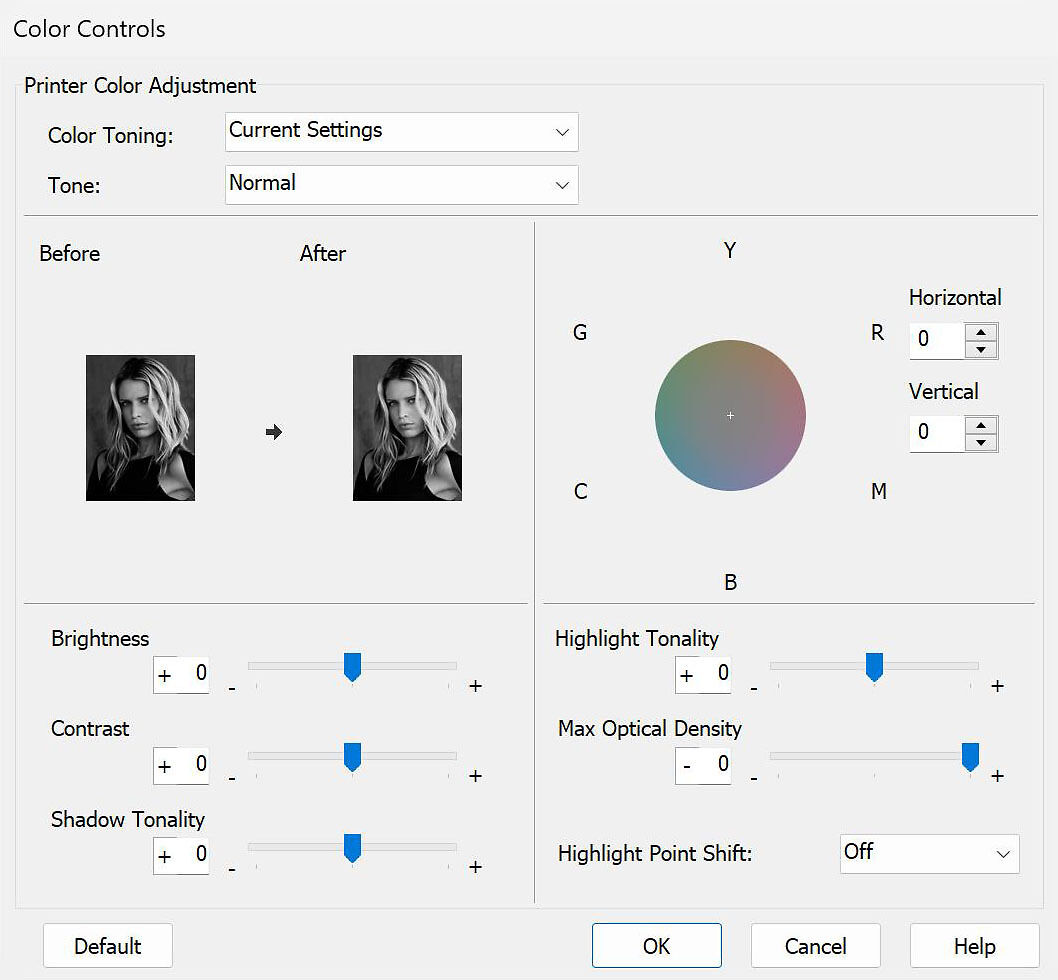
We set this to 'Neutral Normal' by setting 'Color Toning' to 'Neutral', then 'Tone' to 'Normal' (not Dark or Darker if these are available). There is a quirk in the Epson driver that means when you set the tone to normal, the colour toning setting changes to 'Current Settings' - but it is still set to neutral (you can see nothing moves on the toning wheel).
Ensure that all the tone controls are set to neutral and all settings are set at 0.
(N.B. You don't have to use 'Neutral Normal'. If you make the target print and you see a colour cast (or want a colour cast!), you are free to tone your sample however you see fit. The profile we make you will reflect whatever tone is printed. Some clients make three profiles - a neutral, a cool, and a warm. This way they can soft proof three distinct colour tonings that are suitable for different types of images! Also, if you are using a warm paper, the 'neutral' settings might be a bit cool for the paper, and vice versa for a cool paper. Tweak the toning as you see fit to produce the best target print on your paper, but remember to save your settings as you will have to recall these when you actually make prints with the profile later).
Under paper settings confirm you're printing to an A4 Sheet.
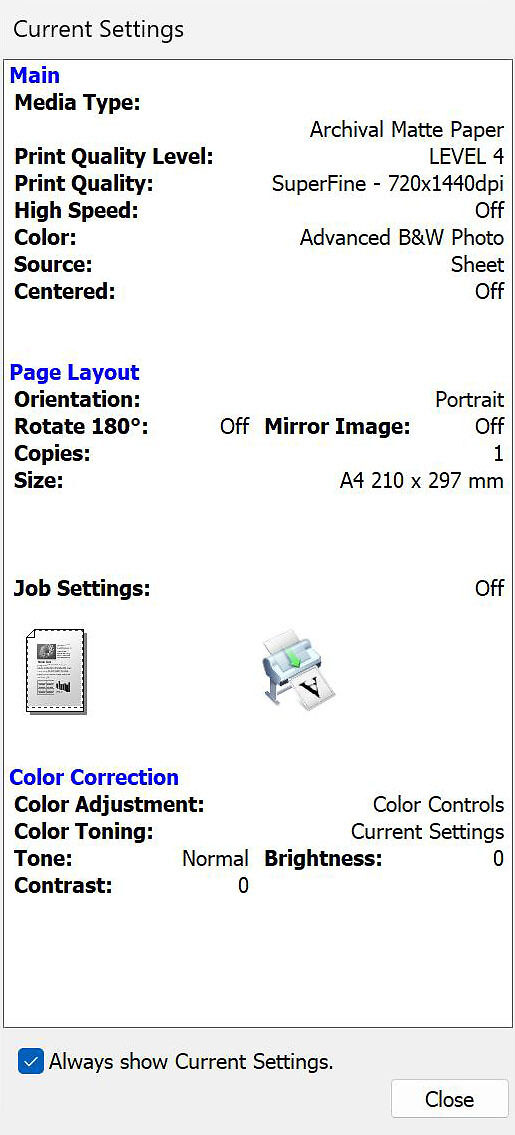
Now check the summary panel to make sure all the settings you think you've set have indeed been set:
Save Setting and Print Target
Save your settings once you are sure you have them correct.
Remember that when you get your profile back you will need to use exactly the same driver settings to print with, so the easiest approach is to save these settings now and then recall them later when you’re actually using the resulting ICC profile.
You can now go ahead and print your target image.
The Next Steps
It is very important that you now proceed to the Evaluating Your Printed Target guide to assess your printed target for correctness before sending it.
Remember, you must supply on a separate sheet your name, email address, printer model and full paper details.