How To Order Artwork Scans
Our online ordering system makes ordering artwork scans simple - once you know what you want to order, and what everything means.
So, here follows our guide to the various options, and how to order exactly what you want!
(Note the online ordering process offers scans up to A1 in size - if you're after scans of larger things, we can do this - please get in touch to discuss & for a quote).
Quick Summary
The basic process is to first build your order using our form, then save that order to your shopping cart, and finally go through checkout to actually place the order with us.
- Hit the 'Add Scans' button to get started
- Choose the size of scan that matches your original artwork's size
- Choose a raw scan or a ready to print scan
(see notes on this below, and this more detailed article) - Choose the resolutions you want the work scanned at
- Add more scans if needed
- Add any notes if needed
- Finally, you must save the scans to your shopping cart, and then proceed to checkout
Each step is described in more detail below.
In our example order, we're going to add two A4 Ready To Print scans and one A2 Raw scan to our order. We explain what all this means below!
Step By Step
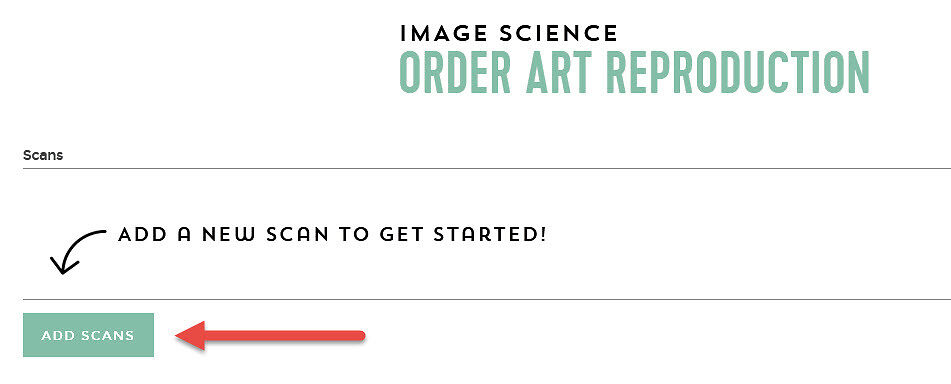
1. Add Scans
The very first thing you do is add some scans to your order.
Use the 'Add Scans' button for this. Each time you hit this button a new row is added to the form, this will make more sense as we go along.
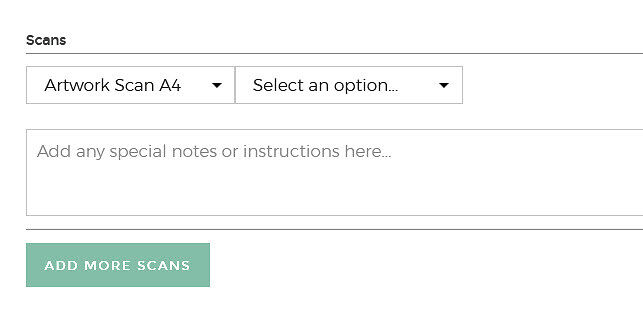
2. What Is The Size Of Your Original?
OK, so the first thing we (and the order form) need to know is how large is your original work? Our pricing works via the A paper system, because that's a handy system to use, but your works don't need to be exactly the size you choose, just close enough in area terms is fine.
If your works are small, with a size (area) up to A5 (half a sheet of regular paper, i.e. approximately postcard size) - then choose:
Artwork Scan A5.
If they're roughly the area of a regular piece of paper, i.e. up to A4 size choose:
Artwork Scan A4.
...and so on - just choose the size that matches or is bigger than your work in area terms, and use that. Note, this is only the area you need scanned - if e..g you've used A3 paper, but the actual work on it is definitely only A4 in size, it's ok to choose A4.
Here we'll start by adding our A4 scans to the order.
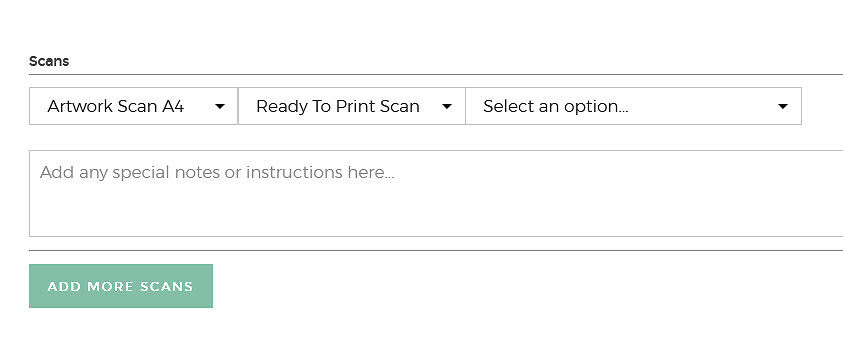
3. Raw or Ready To Print Scans?
We offer two types of Artwork Scans here.
Below is a summary but we have a longer article on the difference between Raw and Print Ready Scans as well. It is really important you do understand what you're ordering, so we definitely advise reading that in full, before your first order.
PRINT READY SCANS - these scans are fully retouched, ready to print scans. These scans are colour and density balanced to match the original as closely as possible, have been cleaned of dust and marks (including optional removal of your signature), and have the background paper tone removed for best reproduction.
This is the service we recommend to most people unless you have very strong Photoshop skills and are working on a high quality, calibrated monitor.
Turnarounds for these are usually in the one to three week range.
At the end of this process you get a digital link to both your RAW scans and the retouched, print ready files. You also get an A4 proof print of each work you've had scanned.
RAW SCANS - these are scans straight off our (superb!) scanner. These scans are not yet print ready.
These scans are intended for people who have experience working with raw art reproduction scans, are skilled in Photoshop, and are working on a high quality, calibrated monitor. Whilst the colour will be good, some final balancing work, cleanup, and background removal will be required to make the image print ready.
These are normally turned around in 1-2 days.
At the end of this process, you get a digital link to your files to download.
If in doubt, choose Print Ready Scans
Not to toot our own horn too much, but we're really very good at this work and the goal here is to get your digital files into absolutely the best shape possible for all future purposes - of course for print making, but also other purposes such as marketing - and to keep a superb digital archive of your work.
Even if you feel you're generally ready to take on the retouching work yourself, we often recommend you have at least one work done to Print Ready state by us, so you can get a benchmark of what to aim for with your own work.
Following on with our example, we'll choose Ready To Print scans:
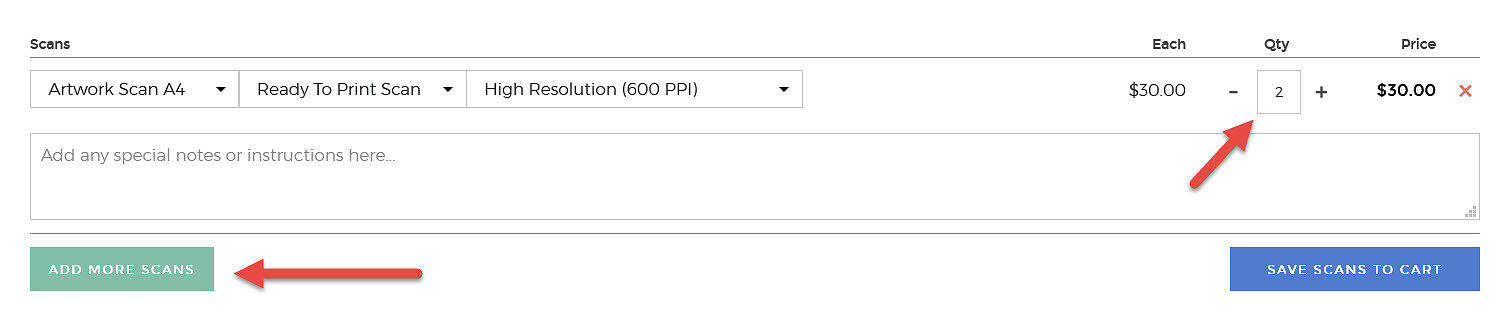
4. Resolution
The resolutions we quote are real, optical resolutions. These figures are nothing like the made up resolutions that your cheaper, typical desktop flatbed scanners report.
Our scanner is significantly sharper at 600 PPI than even 'good quality' desktop scanners from e.g. Epson or Microtek are at their highest resolutions.
High Resolution (600 PPI) Scans - are our generally recommended option. These scans will retrieve all the detail from most works, and are suitable for reproductions to twice the size of the original image, or more.
Super High (1200 PPI) Scans - are the thing to use if you have exceptionally detailed work, you have a very small original work, or you want to enlarge your original to 4 times the original size, or more.
In our example, We'll choose high resolutions scan. We'll also change the Quantity to 2 as we have two of these works to scan (click to see a bigger version):
Add Notes, More Scans, & Done!
To finish our example order, we'll hit 'Add More Scans' to add the A2 Raw scan to our order.
We'll also type in some notes...and then, we're done.
All that remains is to save these scans to the shopping cart and then we can proceed to checkout to finish the order!
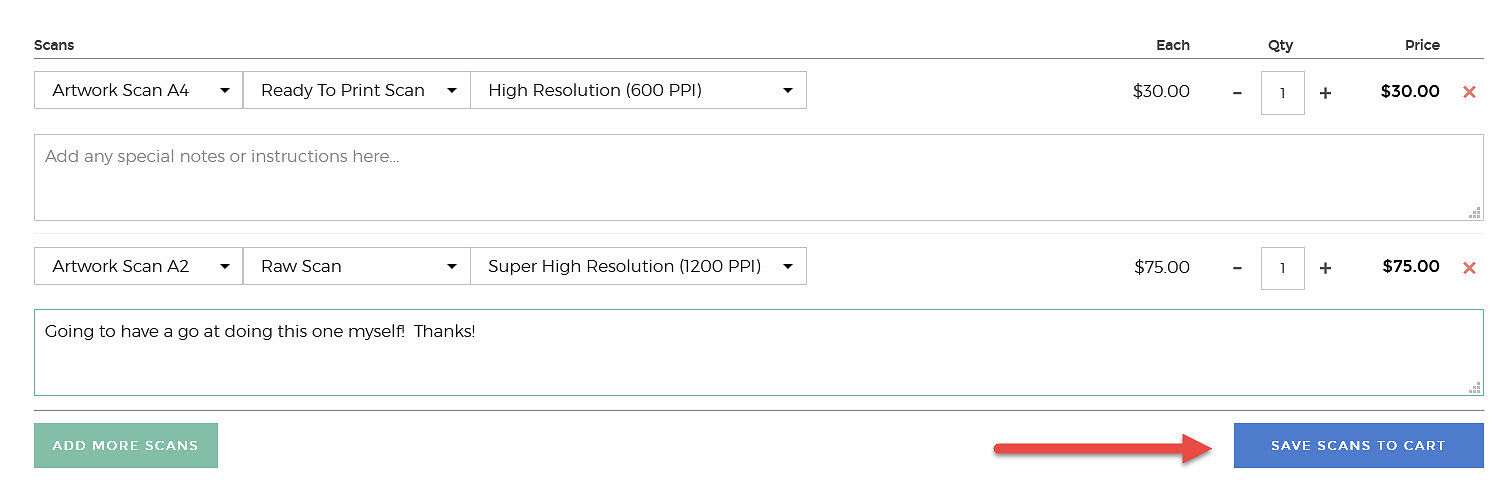
You can see that the order form, once filled in and read from left to right, top to bottom, becomes an easy to follow declarative listing of your order.
It's really like a simply spreadsheet of what you're ordering, with each row being:
Artwork Scan Size - Scan Quality - Resolution * Qty = Price
Complete and Submit The Order
Once you have saved your scans to your cart using the blue button, you can view your cart (using the green cart icon that will appear on the blue button - or at any time you can go to the top right hand corner of the page and click the cart icon of course).
From there, you proceed through our checkout process as with any other order.
(Of course, if you've chosen ready to print scans and want to order prints at the same time, you can use our Print Order Form which works much the same way, to order your prints).