10 Tips for Easy Ilfotex Installation
Introduction
As wonderful and versatile of a material that Ilfotex is, it can be difficult to handle and install at times – especially when you get into the larger sizes. In this article I hope to give you a few helpful tips to make your life easier when it comes to Installing Ilfotex.

Ilfotex - A Self-Adhesive Marvel
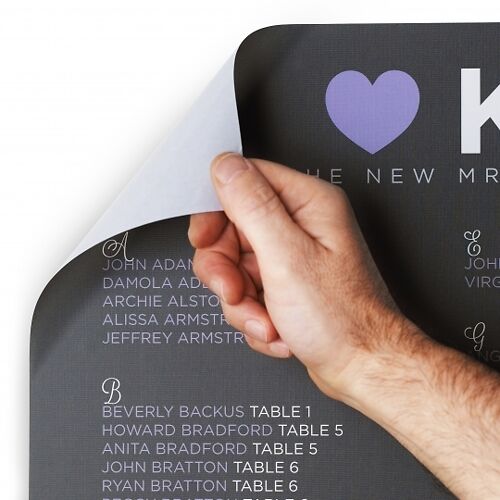
Ilfotex is Ilford's Self Adhesive Fabric – a 275gsm re-positionable Photo Textile that is perfect for exhibition wall installs, signage & other creative applications. You can print on it with any water-based inkjet printer.
Ilford describe it like this:
It is a peel and stick, self-adhesive woven fabric material that can be installed on almost any flat surface, including poles, corners or wrapping around walls. The active adhesive also allows for easy, no residue removal. Featuring a 150 x 150 base weave for sharper images, brilliant colour rendition and saturation. Ilfotex is non-toxic PVC free, heavy metal free and phthalate free.
We Print on Ilfotex
Here at Image Science we offer high-quality printing on Ilfotex with state of the art colour management using the latest and
best Epson printers and inks. We've been offering fine art printing
services for 20 years and so have more experience to draw on than any
other service in the country. Our service is perfect for anyone who wants beautiful prints of their
photographs, artwork or illustrations. We were the first lab in
Australia to be certified by both Hahnemühle and Ilford as fine art
printing experts.
Ilfotex prints are only available on a 42 inch roll and are printed in half metre increments up to a maximum length of 3 metres (Note the maximum printable width on the roll is 100cm - thus each charging bracket is 100 by 50cm).
The 10 Tips
1. Know What It Is (And Isn't!)

Ilfotex is perfect for exhibition wall installs, signage & other creative applications. Ilfotex is a photo textile, and while great, is not archival or quite of the same level of quality as proper fine art papers from the likes of Hahnemühle, so don’t expect quite the same longevity, archival performance, or top-tier colour accuracy out of it.
2. Let It Dry
Despite the official spiel about Ilfotex being touch-dry, in our experience after it’s come off the printer it’s best to be a bit careful with it. You really need to give it 24-48 hours to just sit flat and dry properly. Dark colours, and especially black, can smudge very easily when handled – which you’re going to be doing a bit of when you get to installing it.
3. Clean Your Walls
It goes without saying, like any sticky self-adhesive material, you want to make sure the surface you are applying it to is clean and dry. If you’re trying to stick it to dust and dirt then it’s going to stick to the dust and dirt, not the wall. Depending on the wall surface we recommend cleaning with a micro-fibre cloth and warm, soapy water - no nasty chemicals and nothing that will leave any residue. Make sure you then let the wall dry completely!
4. Do A Dry Run
Don’t go straight into sticking it up, plan it out first. Think about where it is going to go, the space you have, take the time to measure everything up. Keep the backing on and physically hold it up to the wall where you want it to go (see point 6). Take a step back and have a look. Handling it with the backing on provides the opportunity to get a feel for handling and practising moving it around – it can behave differently than you might expect, minimise the chances of surprises, do a dry run.
5. A Laser level Is Your Best Friend

Following on from the last point, one of the best tools you can possibly have (apart from a couple of stepladders) - is a laser level. It doesn’t have to be an expensive one (the can be had quite cheaply from places like Bunnings), or even ask around and see if you can borrow one from a friend. They are honestly indispensable in ensuring ease of installation and a nice even, level, and plumb result.
6. Get Help!
I can’t emphasise this enough – bring some friends. Get some help. Don’t hesitate. For the big stuff you really need 3 or 4 people to install Ilfotex with a minimum of stress. A couple of people up stepladders holding the corners, one to smooth it down/stick it on, and one to hold, guide & supervise.

7. Wear Gloves
White cotton gloves, preferably. You remember point 2 – Ilfotex can have a habit of smudging, and wearing gloves not only minimises the chances of this, but more importantly also lowers the friction between your hand and the material, making the next steps of actually installing it even easier.
8. Tear A Strip Off The Top
No, not off your print. Carefully lay it printed side down (see point 6 – get help), no dragging, just gently place it down and here’s what you’re going to do... You want to start peeling off the backing, exposing the sticky adhesive. Peel down 5 or 6 inches and then using a ruler tear the backing off straight across. This will leave you with some exposed sticky which will help you start the installation off. We find this technique much easier than simply folding those first few inches over on itself, as that has a habit of folding back up and getting in the road at the most inopportune times.
9. Time To Install
We’re finally here. The time has come to actually do it. We’ve
measured up where it’s going, we’ve got our laser level in place to
ensure it’s nice and level, everyone involved has white cotton gloves
on, and a strip has been torn off the backing in preparation. Two of
your helpers need to grab the top two exposed corners, and with the help
of a third, carefully lift it off the table and carry it over to your
wall.
Each of your holders will carefully climb their respective
stepladders (if necessary) and manoeuvre the print into place according
to your measurements, markings, and laser line. Keeping it taught and in
line with your laser, a third person (you) should come in and gently smooth the middle of the top exposed
strip down onto the wall.
You’re aiming at gentle, even-pressured, broad
sweeping movements with the gloved hand, using the back of your hand
and the meaty edge potion near your little finger to sweep outwards a
little section at a time – almost like washing a window. Another person
should be keeping the bottom taught and at a very slight angle off the
wall.
Once you’ve got that initial 5 or 6 inches fully stuck down with no wrinkles or bubbles and you’re happy with it, then you can go ahead and start peeling off the rest of the backing, 5 or 6 inches at a time, from the ripped edge, folding it downwards as you again gently smooth out your section from the middle out. Make sure a helper keeps some tension and a slight angle from the bottom. Gradually work your way down until all of the backing is off and it is fully stuck to the wall.
10. Remember, It’s Repositionable!
Just because it’s stuck doesn’t mean it’s permanent. Wrinkles and
bubbles aren’t the end of the world. It is repositionable – don’t be
afraid to lift a section off and have another go to get rid of any of
those bubbles or wrinkles. Just gently lift it off the wall from an
edge. Just be sure to keep tension on the lifted section as you’re
smoothing it back down using the aforementioned technique. It’s a big of
a fine balancing act to stretch and smooth it to get rid of
imperfections. You need to make peace with the fact that you may still
be left with 1 or 2 small bubbles.
Practice makes perfect. Just take your time, go slow, and only do a little bit at a time – get a section right before you move on.