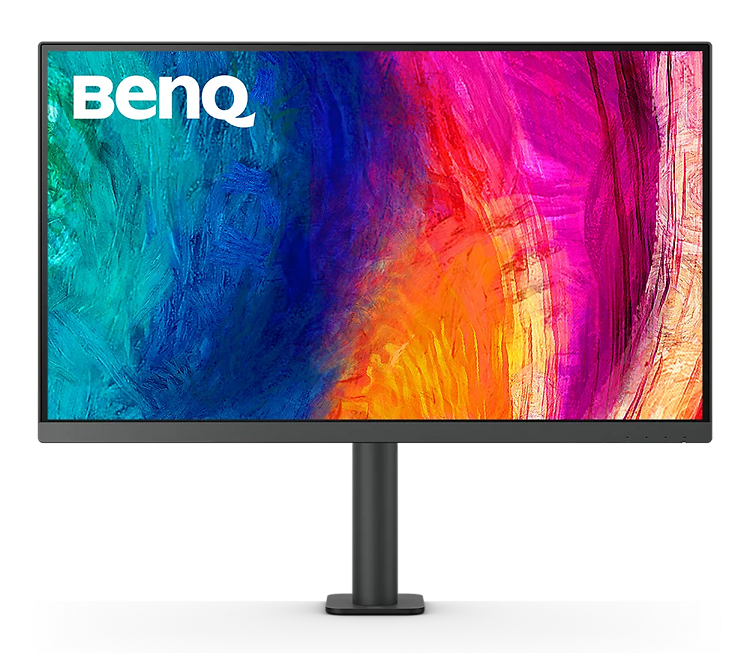
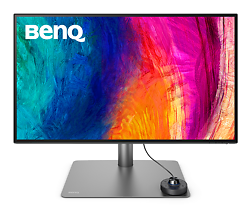
▪ Get $200 off BenQ PD3225U and PD2725U monitors for a limited time only! See details here.
▪ Get a FREE Ergo Arm worth $169 when you purchase an eligible BenQ monitor! See full details here.
Please note that we are open by appointment only (except for click and collect pickups once notified ready).
This article is a little different for us, but is in fact the first in a new series of monitor evaluations.
We spend a lot of time looking at very advanced, expensive monitors - which are, of course, awesome and perfect for working imaging professionals with a deep interest in, and need for, colour accuracy. But not everyone needs something of that level, and of course those high end options are not particularly affordable.
In recent years, BenQ have been fleshing out their 'Designer' range of monitors with a bunch of high quality, interesting new options. So we thought we'd start taking a closer look at what these more affordable models bring to the table - and, of course, what they do not bring, versus the higher end models.
Note: This is the first of three articles coming about BenQ PD monitors - the second (an evaluation of the BenQ PD2725) - will follow shortly, as will an article on a very exciting and unique new product from BenQ, that we're not yet allowed to talk about!
Bridging The Gap
BenQ Designer monitors are squarely aimed at the 'Content Creation' market.
This is a market that sits in-between typical day to day office use where colour accuracy is not a requirement, and the very stringent colour accurate requirements of, say, the higher end of the photography and video markets.
The idea of these Designer models is to fill the gap between the fairly terrible quality of colour reproduction that your typical office monitor provides, and the very high quality colour reproduction monitors of the Photo/Video models in BenQ's SW range. And of course to hit that same gap in pricing terms as well - these do cost a little more than the cheap-and-nasty 'Officeworks whatever' models, but also have distinctly lower pricing then the high end options.
BenQ has always been particularly good at providing a lot of features - and usually well implemented features too - for a very reasonable price. And they make products that look good, while doing their job. The PD2705UA is a good example of this.
(Even their excellent SW range, designed for professional imaging tasks, are in fact priced very competitively for the quality level they provide - but there's no arguing their pricing level puts them into a different category).
The Content Creation Market
Content Creation is of course a very broad term. More and more people are now working in some form of content creation, at least some of the time - and those people need quality tools to produce quality content. (And what with Covid and all this remote working - just about all of us have been content creators at one point or another in recent times!).
Monitors like these are likely to be of interest to all sorts of people, working in all sorts of areas - including, not limited to:
...really, just about any area involving images, media, layouts, plus the simpler ends of photo and video work.
The BenQ PD2705UA is simply a BenQ PD2705U with its traditional monitor stand replaced by a flexible, ergonomic arm with a clamp mount. You pay an extra $100 or so for this model over the standard model. A good quality monitor arm, on its own, will soon cost at least that. On the face of it, then, this package presents good value.
(If you need something bigger - there is also a 32 inch model - BenQ PD205UA available with the Ergo Arm).
Let's dig in.
The core part of the package is the BenQ DesignVue PD2705U monitor, from BenQ's 'Designer' range of monitors. BenQ have simply removed the traditional monitor stand and swapped in a high quality monitor arm, which dramatically enhances the usability and flexibility of this high quality monitor.
Let's look at some of the key specifications of the monitor itself:
The arm supplied with the BenQ PD2705UA offers a very significant amount of adjustment to height, location, and pivot.
Some assembly is required (see below). It then attaches to you desk with a standard, secure clamp system which allows for up to 60mm of thickness, meaning just about any normal desk or trolley should be covered.
The arm is attractive and simple in design, a lot less robotic looking than most, meaning it complements a neat, professional desk setup very nicely. It also features integrated cable management, so you can keep everything nice and tidy whilst still have a highly flexible setup, where you can move the monitor to almost any position very easily.
There is also a standard VESA 100x100 mount on the BenQ PD2705UA, should you ever wish to use another arm (e.g. a dual monitor arm setup) - or revert back to a traditional monitor stand, for some reason.
Typically it takes me about 5 minutes to get a new monitor up and running and to the point where I am ready to calibrate it. Given this is something I do very frequently, I'm glad it doesn't take long.
It's fair to say, this one took me a little longer, and I think there are a number of improvements BenQ could make to help with this.
The first issue I had was in simply opening the cardboard box the monitor comes in. This is because the 'How To Open' instructions are on what is, as far I can tell given the labelling, on the bottom panel of the box - i.e. if you have the monitor standing vertically upright, as you normally would (and as the labels on the box itself indicate you should), then you can't see this text because it's on the ground. I couldn't then work out how to open the box and thought I was going to have to resort to hacking in with a box cutter, before it occurred to me to check this 'floor panel'. I don't think, in 20 years and having used and setup countless monitors, I've ever had a key piece of instruction hidden like that!
Still, once finally found, the instructions were easy enough to follow. Inside the box there is, of course, far too much plastic and polystyrene for comfort. Obviously, it doesn't serve anyone to have the monitor inside not fully protected, but we are seeing a move towards significantly more cardboard vs. foam, and would have liked to see this here. (I have had this explained to me by the manufacturers as being a problem related mostly to container shipping - apparently, on long sea voyages, enough humidity can enter the shipping containers that cardboard (even inside the box) gets warped. This then means that all the pallets have to be plastic wrapped to prevent this, meaning the removal of plastic from the individual units results in much more plastic being used elsewhere).
Clearly, it's a tough nut to crack, but BenQ and others are at least aware that consumers would love to see improvements in this area, and we hope that will start to happen in not too distant future years. Whether it's a bio-degradable plastic, foam, or cardboard...just anything that is more sustainable would be good!
The other aspect I found confusing was the instructions for actually mounting the monitor - and to check it wasn't just me being dense, I got several other people in the office to try and follow the instructions as well, with each having the same confusion I did. The problem is the 'IKEA' style instructions - there's not much explanation text, just a bunch of diagrams with crosses and ticks. Once you work it out, it's fairly clear - it's describing two quite different mounting scenarios. One - mounting the arm through a 'grommet' hole in a desk (i.e. a cable hole) - and Two - mounting the clamp on the edge of the desk. Perhaps we're all a bit stupid here, but this was not immediately obvious to any of us.
Once that is worked out, the actual assembly and mounting is then pretty simple. First you mount the pole part of the arm, then clip in the 'monitor head' (the arm bit of the arm) into the monitor, and then just drop the monitor and arm into place on the pole.
Mounting the main arm pole (once the instructions are understood) - is really just winding up a clamp. I did first have to use the provided Allen key to put the clamp into the right 'mode' for mounting on a thinner desk (mine is about 16mm thick). From there it's basically just wind it on. Obviously you want it quite tight as you don't want movement in this when you're later adjusting your monitor position. I have attached and detached this to my desk several times, without any marks being left behind.
The monitor panel itself can be attached to the monitor head (which is really the arm bit of the arm) by simply clipping it in. You then just pick up the whole panel + arm assembly, and there is a thick 'pin' on the end of this that goes into the matching hole in the arm - make sure it goes in neatly and squarely. You just pop it in and there's a little screw underneath you wind in and then it's all safe and secure.
The final stage of assembly is to pop the cover plate off and run your cables through this. Your monitor is now safely mounted and you will soon find the arm has lots of travel and flexibility.
Before you get to the mounting stage though, it's all a lot more awkward in handling - unlike with a stand, you can't really just pop this down while you deal with something else, e.g. getting your cables in place - so it's best too have all your cables ready and your workspace all tidy and clear before you start (and see also notes about clamp placement below).
Before actually firing things up, you will need to peel off a small yellow sticker on the top right of the monitor. This is a warning sticker to make sure you don't accidentally try and peel off the panel's matte surface coating - which apparently some people have attempted to do, thinking it was one of those protective plastic sheets. Just pop the sticker off and, as always, be careful not to touch the panel surface with anything hard or sharp (ever!).
The clamp takes up very little surface room on your desk - much less than a monitor stand. This makes for a very neat setup and means you now have access to a lot more useful room under the monitor. I am in fact so convinced by this I am considering moving to an arm based setup permanently.
It's just very nice to use - with lots of adjustment possibility, vastly more than with a stand - including e.g. swinging the monitor right out of the way to the side, should you wish to work on something else (like documents or a drawing) - with a clean, empty area.
You may want to experiment with the mounted clamp/arm a little, before you actually attach the monitor itself to the monitor head. One thing I initially noted, when I first mounted the clamp in the same position as I had my stand (i.e. directly in front of me), was that even with the minimum extension, that is, the arm folded in on itself to place the monitor as far back as possible - the end position was still a little forward of where I wanted the screen (I've got to the point of having 'older eyes', I like my screen well back on the desk!). Re-positioning the clamp more to the side proved the easy solution - I can now position it really anywhere I might want, and the clamp is very tidily at the back right of my desk, leaving a very useful expanse of uncluttered space under the monitor, which is now well back from my seating position. All this I found easier to initially try out without the monitor panel itself actually on the monitor head.
Once I found the right spot, the adjustment possibilities are then just great - way off to the side, in place pivot - really whatever you might like.
BenQ have a nifty video - that shows the process and possibilities.
Mounting the BenQ PD2705UA on the arm, and movement possibilities...
Preferably, use USB-C for everything.
Once the initial assembly is done with, things proceed easily from there.
As ever, ideally use USB-C to connect your display, if you have that option available. This provides a 'one cable for everything' approach and is the easiest and neatest of setups.
The USB-C connection can handle both video and data (for the downstream USB ports and KVM functionality), and will even deliver power back to your computer (~65W), if you're using a device that accepts power delivery over USB-C, like a modern laptop.
Otherwise, connect 1 * video and 1 * data connection.
If you don't have USB-C available as an output from your machine, then DisplayPort is the next best option. Failing that, you can also use HDMI. Those two connections will handle the video side of things (and make sure whatever you're attaching at the computer end supports 4K @ 60Hz over that connection).
In these non USB-C scenarios, you will also need to connect a standard USB cable (supplied), if you want to use the downstream USB ports, or KVM functionality of the monitor.
Right, so we're finally at the switch-on stage!
In my case I have this attached to a custom imaging PC using an NVIDIA Quadro video card using Display Port, and a separate USB cable. At this moment, I am using it as a second monitor alongside an Eizo CS2740 (also running at 4K @ 60Hz), but I've also tried it on its own. Having the roughly ~$3000 Eizo (which is an exquisite machine) next to it makes for an interesting comparison, of course!
Once it's all plugged in, turn the monitor on. The power switch is on the rear of the monitor (far left if looking from the rear). Next to this you will also see the joystick control - more on this below - and two more buttons that can be used for manually switching inputs and colour modes - again, more on this below.
Fire up your computer, and with any luck you'll see a picture. If you don't, you might need to manually specify the input the monitor should be looking at - you can use the button next to the joystick for this - keep pushing it and it will cycle through the inputs - if the monitor detects anything is connected to that port.
Before long you should see an image from your computer. Once your machine has finished booting, we recommend navigating into the monitor's menus and making sure your monitor is receiving the signal it should be. This information is found in System -> System Setting -> Timing. It should say 3840x2160 @ 60 Hz if everything is correct. If not, you might need to go into your Display preferences and tweak things in there until you achieve the correct output from your computer.
Quick impressions of the screen are that the coating is fairly matte - the gloss level is similar to the SW options prior to the SW321C, which has a marvellously matte coating we're yet to see on any other BenQ model. But of course that's from their pro-line, and not really to be expected here (really great matte coatings are hard to do, and thus expensive!). It's definitely matte, nothing like e.g. the glassy Apple screens where all you can see in deep shadows is reflections of what you're wearing...but you do notice, especially with a black background, it could be even more matte - in a perfect world.
The whites are clean and uniform - as is the colour reproduction across the panel as a whole. There's absolutely nothing here that disturbs - it's a really very good image - straight out of the box (thanks to BenQ's factory calibration, see below). I switch on and use $5000 monitors on a daily basis, so I'm not being easy on the BenQ here - most folks would find the out of the box image very impressive for sure.
Being 4K, it's lovely and sharp at any normal viewing distance. (And, it really is time for 4K on the desktop). The frameless design means pretty much all you are seeing is image, with only very narrow bezels at the side and top (~8mm, with the bottom bezel ~18mm). It works really well in a dual monitor setup as the narrow bezels mean there is little break between your desktops. Normally when you have such narrow bezels, the uniformity suffers, but I am not seeing that here - I'm surprised at how uniform it is, even towards the edges. It's impressive.
The blacks are typical for the monitor class and type - being an IPS panel, they're never going to be superb, inky blacks. You have to pay a vastly higher amount for the really good black performance you might want if, e.g., you do professional video grading work. (E.g. the Eizo CG2700X is vastly more appropriate for that specific sort of work, but an order of magnitude more expensive, too...). With this the blacks are good, but there is (as always with IPS) some IPS glow, and you'll find these are best to use in environments that are not very dark. Normal room lighting is fine, and the 1200:1 native contrast is very good - e.g. video playback in general looks great.
This brings us nicely to an opportunity to talk about this monitor's controls....
This monitor has minimal bezels - it's part of what makes it look so sleek and attractive. The functional problem with this approach is, however, that there's really no room from monitor controls on the front of the monitor anymore. Technically, the bottom bezel is thick enough for control. BenQ have decided to take a 'looks first' approach here, and have moved the monitor controls to the back of the monitor. This leaves the front appearance very tidy - in normal use the bottom bezel is entire smooth and plain, though lights appear when you're doing various things.
The rear controls feature a little joystick, and this does take a little getting used to. You slip your hand under the front right, and then push in the joystick to bring up the menus. You then get an on-screen display, and can use the joystick as a navigator. I can say, from customer experience and feedback, that some people really like this - they find it simple, and the love the neat appearance that results. A few customers...do not love it. They find it difficult to navigate as they can't see what their hand is doing while they're looking at the menus, and there's a bit of a disconnect there. Personally, I find it quite easy, but then I'm used to complicated cameras with all sorts of obscure controls on them.
Fortunately, there's another option here - BenQ's included Hotkey Puck. This nice bit of hardware is basically a rotary dial and some (reasonably programmable buttons. It plugs in the back via USB. (Wireless would be better, but you can't have everything!). This then gives you a second control mechanism you can put pretty much anywhere you like.
Personally I'm happy enough with the joystick approach and prefer the minimalism of not having the puck on my desk, but I suspect most people will find a good use for the puck, such as easily switching between frequently used colour modes.
Unusually for a monitor at this price point, the BenQ PD2705UA comes with an individual calibration report (Eizo could learn from this - the ~$3000 CS2740 I have sitting next to it does not, even though it has undergone similar processes - for some reason they don't include the report with CS models!).
All the BenQ AQ Colour models undergo extensive factory calibration - that is, all the PD Designer and SW Photographer/Video monitors, get this. And further, these models get sent to industry bodies like Calman and Pantone for further verification that BenQ have achieved the promised levels of accuracy. BenQ are not mucking about, and guarantee and out-of-the-box level of colour accuracy that other brands don't offer.
BenQ have an information page about their AQ Colour Programme and what it entails. Suffice to say, it means good panels are selected, then these are properly tuned and calibrated for colour accurate performance.
To the side you'll see a copy of the report that came with our unit.
It's undeniable from these results that the fresh-from-factory performance of the BenQ PD270DUA is excellent. And my well-practised, critical eyes agree. Colour reproduction of colours within the monitor's gamut limits (see more on this below) - is very very good. No, it's not to the same levels as the SW series monitors - in particular, this monitor is not great at neutrals - but it takes a very good monitor indeed to really nail those. For a monitor at this price range, the performance is excellent.
The performance is so good, I would suspect many folks who buy these will use these, with no further calibration, for several years (if ever!). Pop the monitor into an appropriate preset mode, and the colour should be more than good enough for many content creation purposes, simply as as is. Which saves the price of a calibrator, and the hassle of calibrating. Huzzah!
The colour quality of the BenQ PD2705UA, as stated above, is very good - indeed, remarkably so, given the price point. Go back a few years and this level of accuracy and performance was a LOT more expensive.
The chief limiting factor of this quality is the gamut limits of the panel. That is - the range of colours the panel can display. The BenQ PD2705UA offers a standard gamut display - meaning the range of tones displayable is limited to sRGB/REC.709 - or the same basic range of tones most monitors have been capable of displaying for the last 20 years or so.
Increasingly, though, designers have a need for more colour - hence the development of wide gamut monitors - that can display a wider, more saturated range of tones. Hand in hand with this has been camera development - with sensors even in basic phones now easily capturing tones outside of the old standard gamut. And tools and file formats to contain and edit these colours have thus appeared as well.
Of course - for many, this will be no limit at all. In fact, a limited gamut is probably even an advantage for many content creation tasks. Notably, work destined for the web remains, almost always, standard gamut. This is true of websites and web development, for example, but also all the images and content destined for website display. Almost everything on YouTube is Rec.709 (the colour standard for HDTV).
I would say the bulk of tasks falling under the Content Creation banner are in fact very often best and most easily done on standard gamut equipment. Having a monitor limited to this gamut range helps you and your work stay safely inside this range. Even in 2023, there are still imaging professionals who deliberately work only within the standard gamut range, as wide gamut work can get complex quickly.
Of course, a wider gamut model means you can display both standard gamut (in a standard gamut mode) AND display wider gamut, if/when you do need a wider gamut option.
BenQ have another great option for you, in that case - the BenQ PD2725 - which we'll be fully evaluating in the next month or so!
Of course, the colour can still be improved, and over time, the monitor will drift from its factory calibration through use. So as the monitor ages, calibration will become more relevant. And, the preset colour modes are not necessarily the best, for all types of work. So calibration is still a very good idea, and worth looking at.
As ever, we recommend you invest in the industry standard professional calibrator - the Calibrite Display Plus HL.
We tried to use this monitor as a first test case to write our guide to their new software - Calibrite Profiler. Unfortunately, that software proved a little buggy, and kept hanging on the section we were most interested in - the calibration results.
So, for the moment, I've simply been using the Eizo CS2740 sitting next to it - in its standard gamut mode - as the reference standard to judge the BenQ PD2705UA's post calibration performance. The Eizo is more than three times the price of the BenQ, so of course it's a lot for this baby BenQ to compete against. I've also been comparing the BenQ to some older Eizo EV models (which are closer in price terms) - and some good quality office monitors from Samsung (which are only a little cheaper).
The BenQ is well ahead of all of these comparisons, barring the Eizo CS2740. It's not even a close fight - the colour and uniformity of the BenQ is immediately noticeably as significantly better than any 'general' monitor you're likely to be using. (Honestly, it makes those others a bit hard to look at!).
Of course the Eizo ColorEdge CS2740 is a different beast. As I made clear in my evaluation - it's just a superb machine. We've sold many of those to many professional image makers, with universally adoring feedback. But in all honesty, in terms of general standard gamut colour reproduction, there's less room between these monitors than the price tags would suggest. If you display a typical, colour, continuous tone image on both, they're going to display things very similarly. From a distance and in many scenarios, you'd be hard pressed to tell the difference - and this would probably cover 90% or more of the actual work of even pretty serious image makers.
So why would you ever need something better than the BenQ PD2705UA? Well, if you need to view and edit wider gamut tones, that's an obvious reason. But there are other areas - e.g. if you're into fine art black and white photography, then BenQ PD2705UA does not have the excellent performance with neutrals you might want - even post calibration, there's a tendency for the neutrals to be overly cool and to vary in tone across different levels. Indeed, a lot of photographic images will push this monitor past it's point of comfort - deep shadows and the highest highlights just won't have the nuance needed from a photographic monitor. So - of course - that class of monitor is still the class to look at for higher end photo and video work.
But for your typical Content Creation work - say you're doing graphic design layouts, web design, or some sort of 3D content creation, such as an architectural visualisation - the very good colour performance of the BenQ PD2705UA is going to easily support your work. Far more so than any typical office monitor or iMac type screen. I know it's the ultimate review cliche - but the performance of the BenQ PD2705UA really is distinctly better than you'd think, given the price tag. Certainly, it's a lot better than I expected.
Ok, so we've established this is a very good monitor.
But above and beyond that, it's the arm that really opens up extra possibilities - particularly if you're using other gadgets, like microphones and cameras.
Let's look at a few specific scenarios a great monitor like the BenQ PD2705UA might be the perfect fit.
Live Streaming / YouTube / Webinar
Anyone who has made any video content for what has become a very common thing, in these days of globalism, and with remote work/Covid going on - knows how quickly these scenarios can get complicated.
Most of us start our journey in this area with a basic web-cam on top of our monitor - which is cheap, quick and easy - but it doesn't take long at all to get frustrated with the limitations and the pretty awful quality you get from your typical web-cam.
Before long, you find yourself buying a proper microphone and using your DSLR/Mirrorless camera. Maybe you add some nice lighting, too. Before you know it there's a snare of cables all around you and not much desk space left for anything. So pretty soon you add a microphone stand with a camera mount...etc...etc.
In a scenario like this, a great quality monitor helps with the creation work itself - and standard gamut is just fine (even desired) in this scenario. But the included arm makes it work so much more effectively in your physical space - it just makes physically arranging all these things so much easier.
Architectural Visualisation
You've created your detailed three dimensional model for the client.
Now, you want to overlay their chosen tones and throw in a good looking sky before you send it off for inspection.
You've got Pantone colours from the client, or maybe some LRV paint values from the interior designer. Maybe it's a renovation, and you've even taken measurements from existing surfaces using a portable colour measurement tool like the Palette Pico.
The Pantone certified BenQ PD2705UA is a great tool for a job like this. You can be sure what you're seeing is accurate, and you're not going to run into any weird wide gamut issues.
You can't control what your clients are seeing, of course, but you can at least be sure that what you're creating and putting out there is what you think it is. You can rely on a monitor like this to support your professional work - it's all about accuracy, meaning you can trust what you're seeing.
Secondary Monitor, Next to a 'Proper' Photo Monitor
Another set up that would suit the BenQ PD2705UA is pretty much how I am using it currently - as a second monitor alongside a 'true' photographic monitor. I use the primary monitor for my actual editing and colour critical tasks, but I don't want the monitor alongside it to be some terrible, low quality thing that is so far off it is hard to look at - that would limit the usefulness, and simply be unpleasant to deal with.
In this scenario, I can use it as extra desktop real estate - good enough for thumbnail browsing, for quick image culling tasks (who thought 50fps cameras were a good idea huh?) - and for checking what my work is going to look like in a standard gamut scenario without having to switch my main screen over. (It also looks lovely with the cover art of the music I'm playing on it ;) !)
Further, with the easy mounting of the arm, I can use it as a secondary viewing monitor for when I am recording content, or I can take it to the studio and attach it to a trolley there for a tethered shooting scenario.
In a way we are just starting this journey - and we're starting it at the beginning.
The BenQ PD2705UA is, by Image Science standards, a humble monitor. It's not the high end dream machines we normally use here. But not everyone is running a world class fine art print studio.
There are many, many people who have a need and desire for good quality colour, but don't want to pay an arm and a leg for best-of-the-best colour. In their work, or for their pleasure, good colour is important - and good colour means accurate colour. BenQ's AQ Colour program, and the resulting DesignVue monitors, are tailor made for those people.
For less than $1000, you get a great monitor suitable for a huge variety of content creation tasks - AND a versatile, good looking arm mount - in an excellent value package.
Note - if you're after something bigger - there is also a very similar, but larger option, also available with the new Ergo Arm - the BenQ PD3205UA.
(Next, we'll be looking at the similar but very sleek, wide gamut PD2725 model, and after that hopefully something new and exciting for content creators - not a monitor, but we're not allowed to talk about it yet!).
- Ash D -Dear Image Science team,
I do not know what sort of wizardry or magic you have performed to not only produce perfect prints, but have them delivered to me unbelievably fast. Thank you so so much. You have saved not only myself, but a gallerist from critical meltdown. I will continue to sing your praises to everyone - thank you, thank you, thank you!
Kind Regards,
Ash